Mounting
Instructions
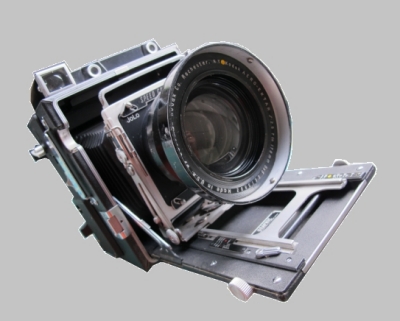
JoLo Lens board for the Kodak Aero Lens
Thank you for purchasing the JoLo lens board to create your very exclusive Personal Speed Aero Combo.
Please read this carefully.
Clean the thread of the Aero lens from
dirt or old grease. If necessary use some lighter gasoline. Make sure no
liquid can enter the inside of the lens.
Check the lens thread for imperfections If you do find imperfections use a
sharp knife or even better a special thin file to repair the thread.
Taped on the back of
your lens board you’ll find the Allen hex key. To prevent damaging the
thread of the Aero Lens, loosen the hex screw as far as needed to allow
the lens board running on the lens thread.
Try the lens board if it runs
easily on the lens thread.
If it does not, loosen the board and try
to find the cause of the problem. Do not force the lens board by turning
it too tight. The lens board might not loosen again without seriously
damaging the thread and thus making the lens unusable.
If it’s okay, you may screw the board clockwise until the end of the
thread and then tighten the hex screw (use the hex key) to fix this
position.
If your camera is equipped with a Graflok
back than remove the back to protect the screen and ground glass while
working on the camera.
If the back of your camera is not removable than put some cloth inside the
camera house to protect the ground glass.
To simplify the mounting of the lens board with the aero lens, swing the
lens standard lock in straight position to be able to move the lens
standard back into the camera. Don’t forget to lock the standard again.
Try to slide the rear cell of the Aero lens inside the square hole of the
lens standard. Most of the time the rear lens would not fit immediately.
The square hole needs a tiny little more play to accept the lens.
This can be done by holding the lens slant above the square while pushing
it. You may find out that this works, albeit that it needs a bit of
patience, force and skill.
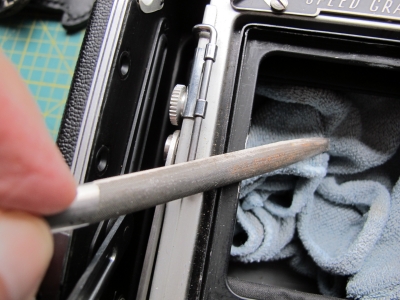
Also filing just a tiny bit off on the middle of each of the
four sides will work fine. The cloth you’ve put inside the camera house
now shows its usefulness to catch the metal dust.
Attention: on each side less than just half a millimetre would be just
fine!
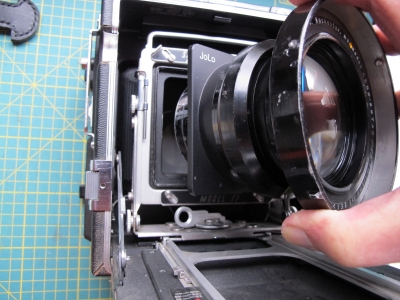
Once the rear of the lens can passes the lens standard mount, the JoLo lens board will find its place there. First slide both lens locks to the right. The JoLo brand name should be on the left side of the lens seen from the front. After the lens has found its place in the standard, both slide locks should be slide back into locked position to hold the Aero lens for as long as needed.
Put the camera on a tripod. Set selector slide on BACK. Turn focal plane
shutter in open position. Set Aero lens diaphragm on 2,5. Turn front
focussing knob anti clockwise until it stops. This is the track infinity
position. However we have to reposition the lens standard on infinity as
well. Unscrew the tiny screws of the infinity stops and slide them towards
the end of the drop bed. Unlock the front-standard lock and slide the lens
standard forward until the image on the ground glass is sharp. Swing the
standard lock to the left or right to fix the lens standard on its new
infinity position.
Slide the infinity stops with the hinged stops upwards tight against the lens standard. Fasten the front screws of the infinity stops. Swing standard lock straight and slide the standard back. Now fasten the rear screws of the infinity stops. Slide the standard back tight against the infinity stops and lock it. This location of the infinity stops has become the new reference point for the Aero lens.
Check again the ground glass on a subject
far away. If the image is not crispy sharp repeat the procedure.
I’m sure that if you follow the above instructions, the lens will easily
fit into the lens standard.
However if you should have any problem with the lens board installation,
please don’t hesitate to ask.
Thanks again for your purchase.
Good luck!
Jo Lommen.
The Netherlands.