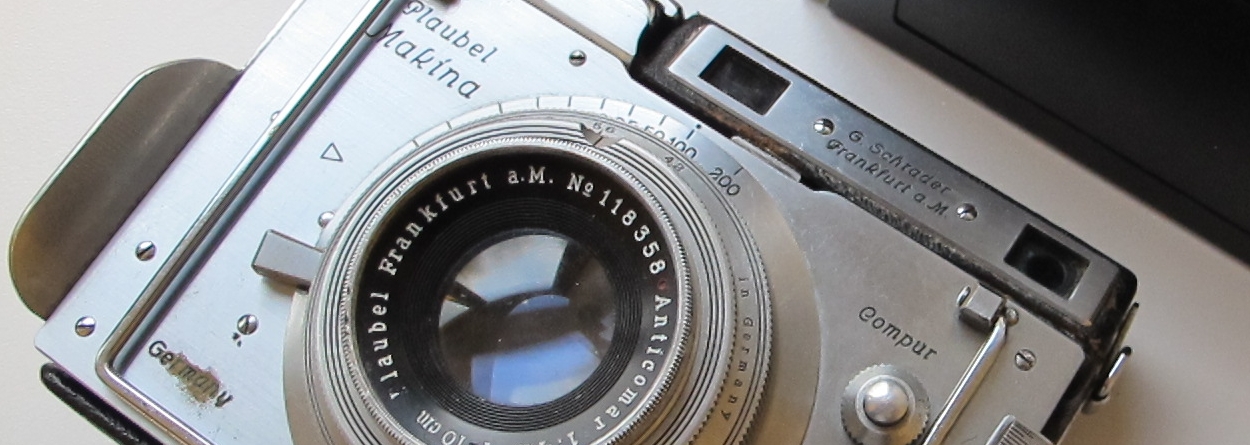
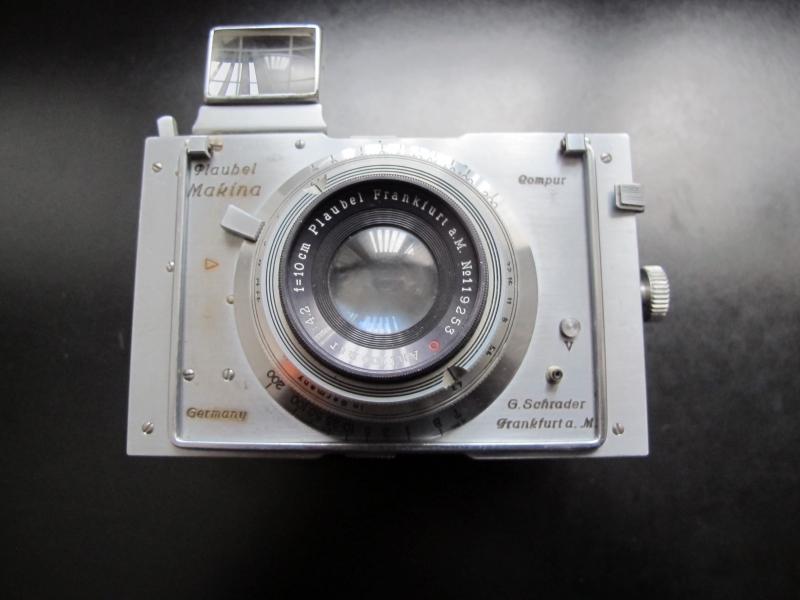
How to tackle a broken PLAUBEL Makina II S
Press Camera 1930-1939
by Jo Lommen
This camera was sent to me for repair because the shutter lever was blocked due to improper cocking.
Despite the warning in the user manual which reads:
"It is important to note that the self-timer cannot be used without damage to the shutter when the latter is set to 1/200, T or B.
The shutter cannot be cocked when the shutter-time is set to T or B"
the owner had forced the shutter lever (S) by pressing it down while the dial was set on T position.
Shutter cocking cannot be done if the rim position indicates T or B.
If the rim is set to B or T the shutter can be opened and closed just by pressing the release knob
no need for cocking the shutter lever and as we learned now, with dramatic consequences.
Let's try to find the cause of the malfunction inside the camera where we find a Compur shutter.
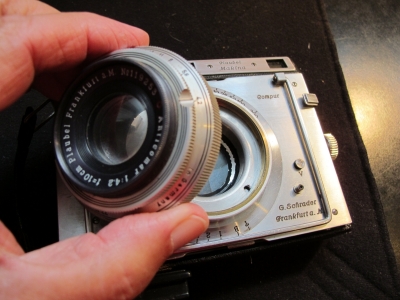
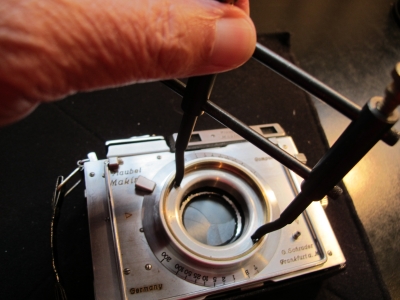
To get to the Compur shutter, one has to unscrew the front lens first which is very easy. Turn it anti clockwise and lay it apart on a safe place.
Attention: Now the lens has been removed the shutter blades are easy to hit when working on the camera.
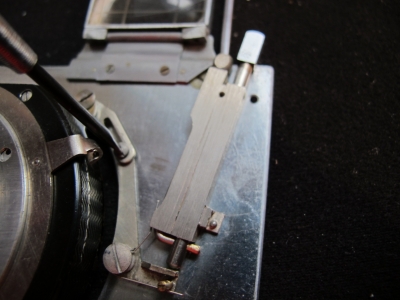
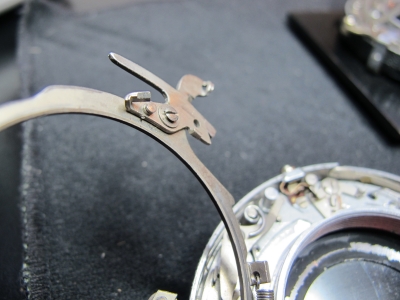
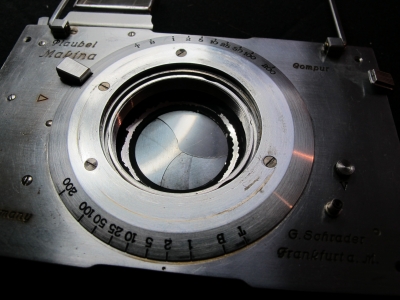
The photos below show
the lens mounted on the camera while working on it.
Recent practical knowledge brought new inside and my advice now is:
Remove front and rear lens.
Open the shutter and the diaphragm to
prevent touching the blades.
To do so, set exposing selector ring on "T" and push release lever A without
cocking the shutter.
Set diaphragm ring on 2,9
Scratching the lens surface or damaging the shutter or diaphragm blades has been
minimised now.
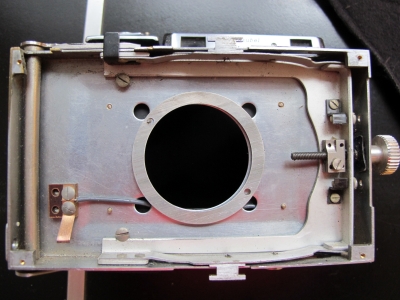
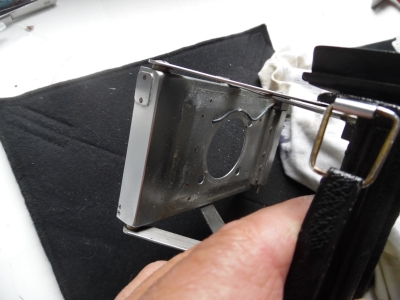
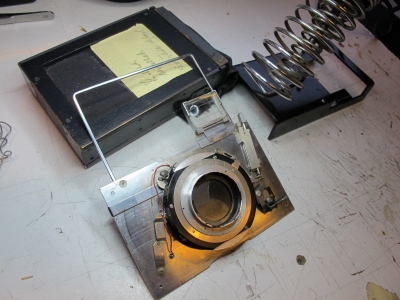
Now turn the camera up site down and open the back removing the ground glass or holder. You now have free access to the inner of the camera. If necessary fold the camera.
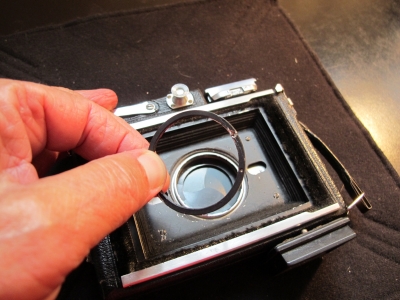
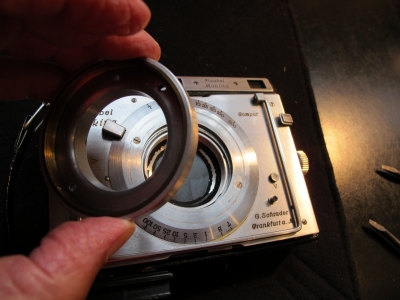
Remove the rear lens by turning it anti clockwise. Now remove the retainer ring from the rear lens. Again mind the shutter blades!
Turn the camera with the front up and remove 4 screws each of them on one corner of the camera. The front will come of without any problem.
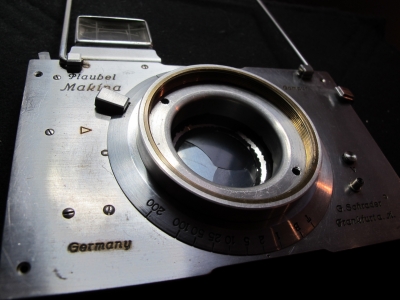
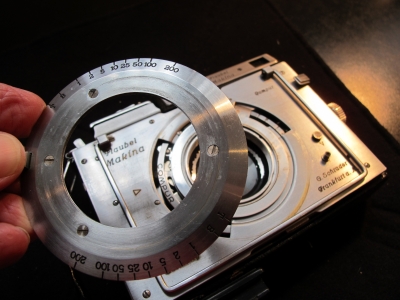
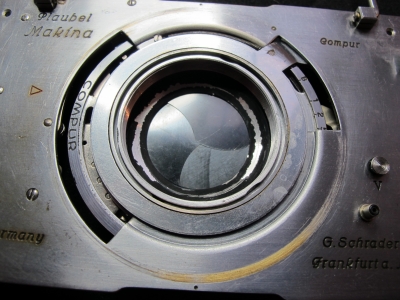
Use a good spanner wrench to unscrew the lens mount which also holds the shutter to the camera front. Please be very careful not to touch the shutter blades.
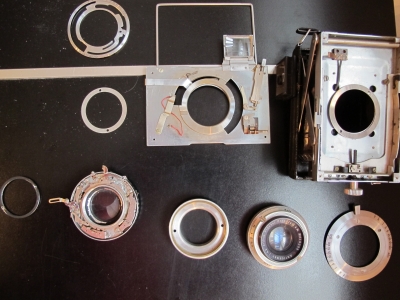
After the lens mount has been screwed off, the shutter rim set can be taken off.
Note the position of the pin on the back of the rim set which controls the exposing setting on the shutter.
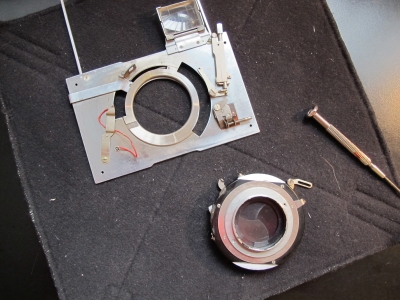
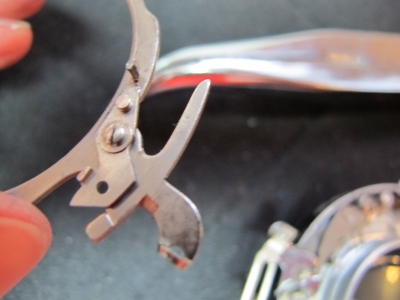
On the left the front lens board seen from the back. On the right a close up from the release lever still connected to the trigger of the Compur shutter.
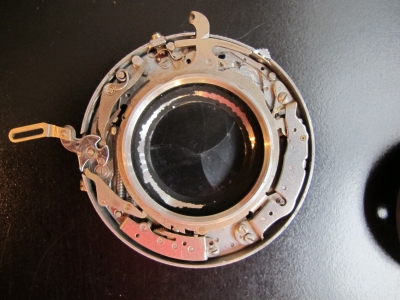
To dismount the Compur shutter off the lens board unscrew the trigger from the release lever as shown on the right photo. Leave the release lever on its place.
Also leave the cocking lever as it is. No need to remove it.
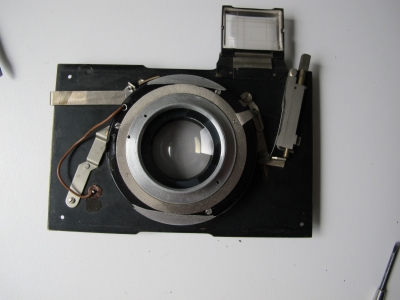
On the left you see the empty camera front house with the focusing adjusting screw on the right and two spacers in the middle. To free the shutter from the front plate unscrew the connection with the shutter release assembly and unhook the shutter from the front plate. If you remove the spacers be sure to mark their position.
Don't forget to remove the electric wire from the flash connector.
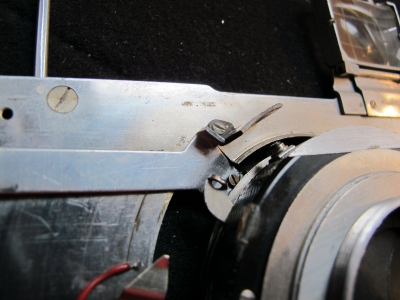
Unhooked !
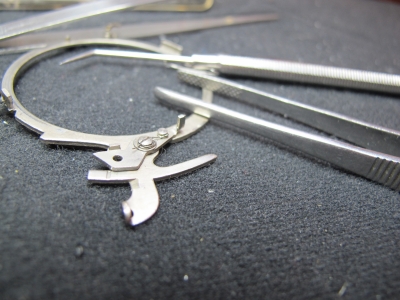
Now the camera is dismantled, you may take a break and after that spend some time cleaning all the parts thoroughly.
We continue finding the cause of the malfunction of the shutter and that is quite a job.
Cocking the shutter didn't work at all. It was stuck and I had to lift the speed setting ring and remove the cocking ring.
Before lifting the speed setting ring it is very important to take a photo of the position of the pins in the slots to make reassembly a bit easier.
Also note the position of the cocking ring once the speed setting ring has been lifted off.
You'll notice the cocking ring spring attached to the shutter. Unhook it at the shutters site.
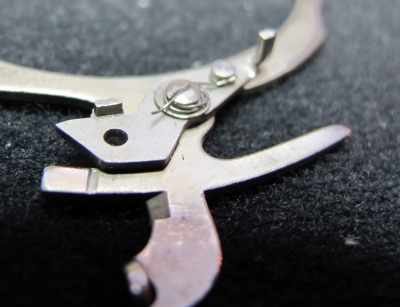
This cocking ring has two levers attached on the underside.
Despite close investigation I could not find any explanation for the failure. It took me hours in trying to replace the cocking ring without any result, so finally I decided to make it easy and disassembled one of my identical Compur shutters to be able to compare both cocking rings.
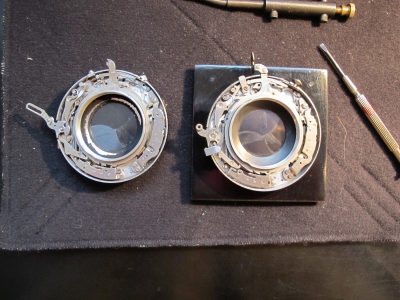
After having done that I clearly could see that the malfunction was caused by a bent link of the release lever.
Very hard to find if you don't know where to look. Well here it is.
On the left you see the bent link on the lever. On the right the good working one.

Carefully bend the link straight. Be careful not to break the link off.
Making a new spring (the old one was lost during the session) cost me more than two hours.
Quite a difficult job brought to a good end. Now reassembling the shutter by hooking the spring into its position and next bringing the cocking ring on its place.
The lever at the bottom has to be pulled in when reinstalling the cocking ring.
Now replace the speed setting ring in the right position. Turn it and feel how the setting ring find its place.
Take the shutter in your hand and test the working. Be careful not to touch the blades.
Replace the shutter from the back side into the front plate position into the center of the outer cocking ring.
Screw the lens mount ring while testing if the position of the shutter still is in the center of the plate and cocking ring.
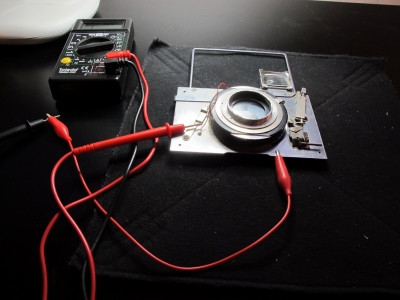
Testing the shutter exposure times and the flash connection.
The very satisfying result is a perfect working Plaubel Makina II camera.
Ready for use.
Shutter no. A488129
Camera no. H49/518
Date:September 11 2015