How to build a viewing hood.
1) get yourself the right
material.
Black 0,12 mm thin opaque cloth. BK5 will do. Not 100 percent lightproof, but
almost. Quite useable for a viewing hood.
0,33 mm black cardboard and a white marker.
Spray Glue for cloth, plastic, leather, foam and card board.
Box cutter, cutting tool, utility knife.
2) The drawing
The most important thing is
to make a good drawing. If you still have the old but worn hood, you are lucky
because you won't need to design the hood yourself. On the
other hand, designing would give you the best possible
glimpse how to fold it down in such a way that it can easily be set strait up
and stay that way.
When copying the old one, the easiest thing is to do is to find the fixation of the two halves of the
chimney shaped hood. Get it lose, lay it flat on the bench with the inside up and study the inside
cloth or leatherette. You may see the outline of the stiffeners which are
positioned in between the inner cloth and the outer leatherette.
Carefully separate the inside cloth from the outside and you'll notice pieces of odd
shaped plastic or cardboard. These are the stiffeners to keep the hood straight
up and the free space between them makes folding possible. If the
stiffeners are in good condition you may use them in your new
hood. If so, you better mark their position. Take a photo. This helps you to reconstruct
the new hood. Now take the measures of the old viewing hood and mark the
stiffeners. For instance Left 1,2,3 etc. Right 1,2,3 etc. One by one lay the numbered stiffeners on their exact same
position on the new paper copy. According to the condition of the stiffeners you
might have to make new ones.
I prefer thin cardboard.
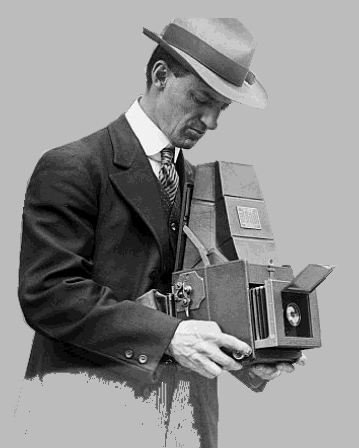
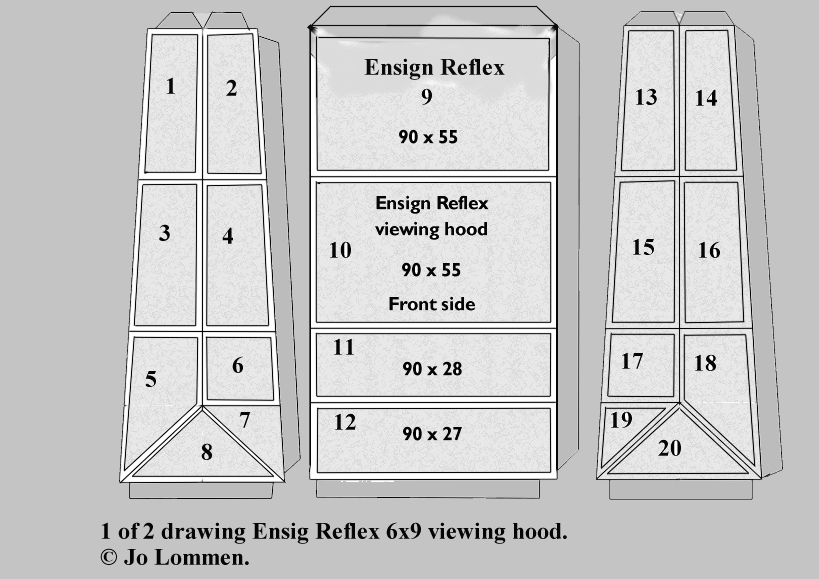
Open the camera cover and measure the inside viewing hood compartment on top of
the ground glass. let's presume this is 12 x 14 cm.
The cover with the carrying strap is supposed to hold the back of the viewing
hood by its two brackets. Most of the time the length or height of the viewing
hood chimney is about 6 cm higher than the length of the cover which is 14 cm as
we have seen. So the height of the viewing hood should be 20 cm. Draw the
rectangle of the inside hood compartment and subtract a few millimetres for play
on each side.
Draw the cover side of the hood and divide it into two parts. The lowest part
should be as long as the length of the ground glass compartment which is 14 cm. The upper
part should be 6 cm. Draw the rear side which is 20 cm high and divide it in
three parts. The lowest one would be half the the length of the
compartment which is 7 cm. The next part above it would be 7 cm as well while
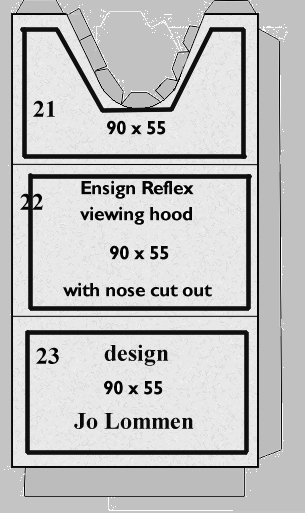
the upper with the nose recess would be 6 cm.
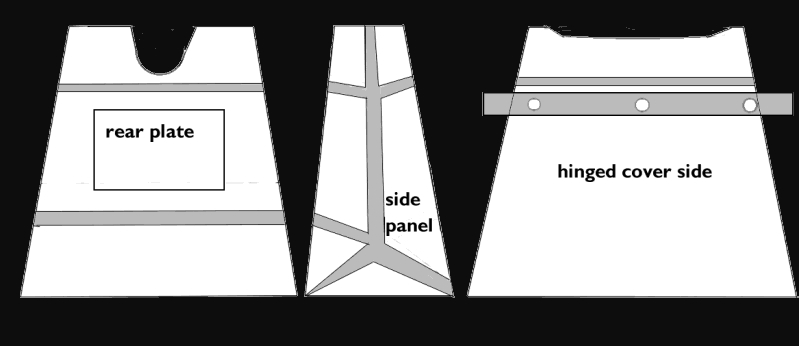
Depending on the type of viewing hood it should be somehow like the drawing above.
This viewing hood type is hold strait up by the camera cover. This explains the
steel bar on the back, respectively on the front of the hood.
Self erecting hoods are different. Some suggestions below show how to make the right drawing.
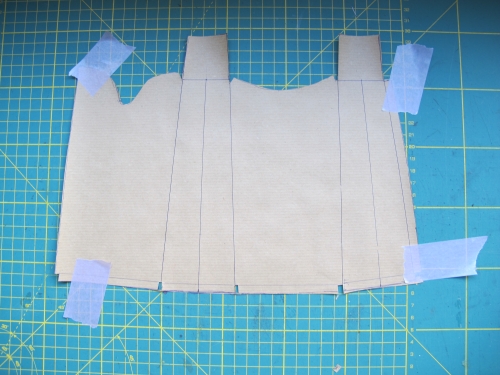
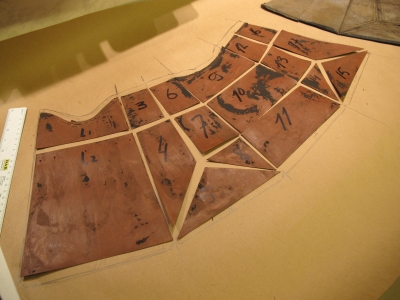
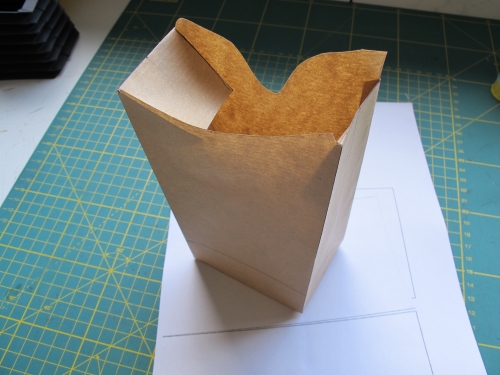
Test your design by making a paper dummy.
The best you can get is the original hood including the stiffeners.

If the old viewing hood is
missing, you would have to design a new one and need the base measurements and
the height. May be also the nose and the forehead recess.
After having drawn the design, glue the paper hood together and test it on
your camera.
Some viewing hoods need hardware to pop up the hood. Maybe it is
still there, hidden somewhere inside the old hood, try to find it.
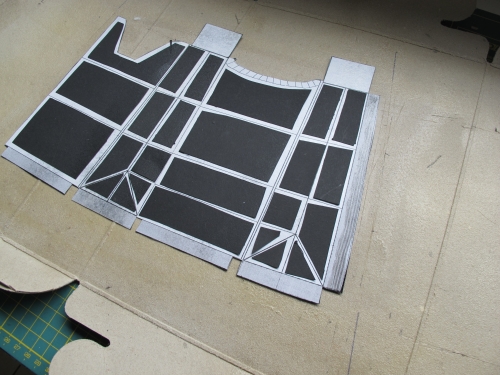
If it fits, add the stiffeners like on the photo above. In the next step you
should cover and glue the whole design with another layer of BK5.
After drying fold the hood in its proper shape and test it.

Home Jo Lommen Camera Back to European cameras